
Your guide to finding roof leaks on shingle roofs and stopping them
Are you trying to deal with a leaky roof? It’s a stressful situation, and it can leave you feeling overwhelmed and frustrated. In addition to that, you need to find the source of the leak and try to get it repaired before it does severe damage to your home.
7 Most Common Roof Leaks + Tips
A. Valleys
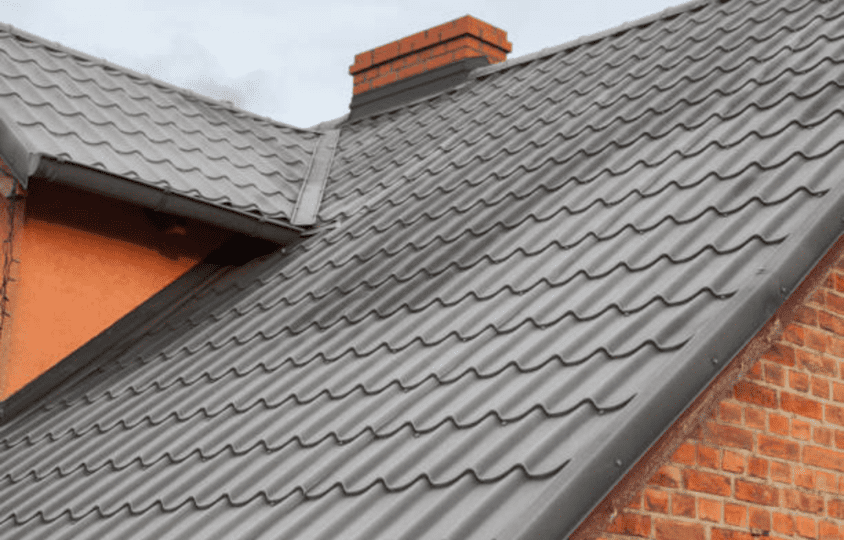
B. Chimneys
C. Walls
D. Vents
E. Open Fields
G. Skylights
There are seven areas where leaks generally occur on a shingle roof: valleys, chimneys, walls, vents, open fields, downspouts & gutters, the roof deck, and skylights. For these common leaks, a professional roofing contractor will have no problem helping you to sort the problem out and fix your leaky roof.
However, we also know that not everyone can get a professional out and your leaky roof might need you to patch it up. This guide will be able to help you find the source as well as give you some patching tips while you wait for the pros.
A. VALLEYS

1. Nails directly in the valley.
This leak occurs when the installer puts roofing nails too close to the center of the valley where the majority of the water flows. There may also be missing nails, and this can be a common issue with your roof deck if you have one.
Roof Leak Repair: A good rule of thumb is to keep the nails ten inches out of the center of the valley. You can use roofing cement to fix the small holes that are caused by improperly secured nails.
2. No underlayment in the valley
This leak occurs when roofers fail to install ice and water shield, rolled roofing, or metal (3 ft. Wide) under the shingles and up the entire valley. If you are concerned that your roof deck, for example, has holes and leaks caused by this you can give it a spray with the garden hose to detect leaks.
Roof Leak Repair: The answer to this problem is removing the shingles on either side of the valley, installing underlayment, and putting new shingles back. You can also use roofing cement to repair holes and gaps left behind.
3. Failure to tip or horn shingle corners at the valley.
This roof leak occurs when installers fail to tip or horn the shingle corners at installation. This leak may take years to show up, especially if underlayment was originally installed on the roof.
Roof Leak Repair: This is the simplest and most cost-saving fix. It is done by separating the overlapping shingles in the valley (two sides for an open valley and one side for a closed or sometimes called a one-cut valley).
After separating each shingle, cut off the pointed corner underneath them and secure any gaps using roofing cement. This prevents the water from catching the point of the shingle and running sideways out under the roof.
B. CHIMNEYS

1. Failure to install roof flashing properly.
Proper installation of chimney flashing starts at the bottom of the chimney with a base flashing covering up the last exposed row of shingles on the roof and extending up the bricks.
Individual flashing cards are bent at a 90-degree angle and are woven between the shingles up the sides of the chimney.
Roof Repair: When installing flashing cards make sure to extend the first flashing card beyond the bottom corner of the brick chimney. Failure to do this is a major cause of chimney leaks.
The subsequent flashing cards should be lined up with the bottom of each shingle. You may also need to use roof cement for small gaps and holes that are left behind or caused by the leaking chimney.
Roofing Repair Tip: Failure to do this can be can also be a cause for roof leakage. Installers may inadvertently slide their card up past the one below it causing a gap, and a leak.
The next step in the flashing process is installing counter flashing over the flashing cards, cutting it into the brick, and wrapping it around the corner of the base (beginning) flashing (which should also be cut into the brick). The last flashing in the process is where most leaks occur and that one is installed behind the chimney.
If the chimney is wider than three feet, it should have a saddle behind it which is a small gable roof with two valleys. This prevents water and ice from pooling behind the chimney.
Leak Repair: When shingling up around a saddle the most important thing is the installation of the first card at the bottom of the saddle. This is the intersection of the bottom corner of the valley and the corner of the brick. This first card has to be handmade (unlike standard flashing cards which are 8 inches by 8 inches). This first card is known as a pan and should be a minimum of 12 inches by 18 inches.
The proper installation of the first card is also key. Make sure to nail in the top two inches of the card near the chimney, keeping them away from the valley.
When looking for leaks behind a chimney, the lack of a pan flashing is often the cause; especially in a wintry climate.
The final process in flashing a chimney is applying roofing cement or caulk where the metal meets the brick (solar seal, quad, geocell). Make sure the job is neat and thorough.
2. Chimney leaks caused by failed brick, mortar, and chimney caps.
Leaks caused by failed bricks are sometimes difficult to detect because they aren’t obvious. Some bricks don’t repel water well (especially in cold climates).
Leak Repair: In those cases applying clear masonry sealer or roofing cement over the bricks is the answer. The only time to do that is when the bricks are dry. Some bricks can be so saturated that flashing being cut into the brick is not enough. In the case of bricks delaminating, replacement is the answer.
A cracked chimney cap can also be the cause of a chimney leak.
Leak Repair: A patch is a temporary solution but a new cap is obviously the best. On that note make sure the mix for the chimney cap has some cement in it and not all mortar (1/3-2/3) respectively.
C. WALL LEAKS

1. Improper step flashing which is often old step flashing.
Roofers often skimp when applying a new roof and use the old flashing cards which are full of the old nail holes. This can cause a leaky roof, and because the holes are very small it can go unnoticed for a long time.
Roof Leak Repair: Replace the old metal flashing cards with new ones. (Always make sure that the flashing card is a minimum of two inches longer than the exposure of the shingle.)
Installers often fail to tuck their flashing cards up under the siding far enough because of low siding nails. Removing the siding and reinstalling the siding after the flashing is in, is the cure for that leak.
2. Another possible leak at the wall can occur when a flashing card is applied and the bottom of it lands at the pointed edge of the top of aluminum or vinyl siding. The siding lip acts as a trough for the water to catch onto.
Leak Repair: Cutting the interior lip of the siding lets the water out onto the roof instead of it running behind the siding.
Sometimes low nails on a flashing card that aren’t fastened securely can be the cause of a leak. Water catches the base of the nail and finds its way in.
Leaky Roof Repair: When searching out wall leaks check the siding itself for improperly installed siding, trim channels, or knotholes in the wood siding and expansion gaps between pieces.
D. VENT LEAKS
1. A ridge roof leak that’s found in the roof vents can be caused by a shingle not being tucked under its bottom flange.
Square back roof vents leak when shingles are pushed up against the vent.
Leak Repair: It’s best to leave a space for the water to run out.
Remember, shingle roofs and their accessories are designed for water to run off (that is why taring flashings and vents on the roof is not recommended because it inhibits the flow of water, and increases the cost of repair due to the mess it creates).
2. Plumbing stacks can leak at the rubber gasket where it meets the pipe and the flashing.
Time and ultraviolet rays rot the rubber seal out.
Leak Repair: The remedy for this is replacing the flashing or putting roof sheathing over the pipe – flashing.
Old plumbing stacks don’t have the rubber gasket but rely on caulk or lead which could have worn away. This could be the source of a leak. Sometimes when a plumbing stack leaks it’s doing so inside the pipe itself. When plumbers install the stack pipes they fail to glue the joint at the elbow, causing a leak.
Leaky Roof Repair: One way to find that leak is by pouring a little water down into the pipe. Old galvanized joints can form the same leaks as PVC joints. This is usually caused by a rotten/rusted pipe joint.
If a plumbing fixture is too expensive, a mushroom pipe cap, which fits over the top of the pipe, is the answer (they leave an air space so the plumbing pipe still vents).
3. Wide square back roof vents can also leak.
Roof Leak Repair: The solution for those is to cut the tips of the top corners of the shingles at an angle from low to high so the water runs toward the vent and not out under the shingles. This procedure is done while cutting shingles off that butt against the vent.
E. OPEN FIELD LEAKS

Open field roof leaks are those that occur out in the broad expanses of the roof.
1. Probably the most popular open field leak is caused by the improper staggering of shingles when installing dimensional shingles.
Shingles that are staggered less than 3 inches can leak from water running sideways (especially if there are dips in the roof).
2. Improper nail placement is another cause of leaks in the open field.
If roofers aren’t careful to avoid shingle joints in their nail placement this can also cause leaks that are hard to detect.
Leaky Roof Repair: The fix for this and improperly staggered shingles is sliding a flat 8×8 flashing card under the shingles at the joint(this might involve removing and replacing some roofing nails).
3. Some open field roof leaks may travel from another area such as the ridge vent.
This leak usually occurs when the final shingle isn’t long enough, being tucked under the ridge vent, and the leak displays itself in the shingle below on the top edge and runs down the open field of the roof.
One of the most peculiar open field leaks that I ever encountered was related to a protruding rake runner shingle. The rake shingles were run up the roof edge about a 1/4 of an inch inside of the rake shingle except for one slightly tilted shingle that was about a1/2 inch inside the runner. The top of that shingle caught the water, ran it across the roof horizontally, and formed a leak.
4. Leaks that show up in overhangs are usually a product of starter shingles that were not staggered or ones that were never installed.
Leak Repair: The way to track down some open field leaks is by carefully and methodically looking for cracks or holes in the roof. These types of leaks are from tree branch holes or basketball hoop brackets that have been taken down (the bolts that held them in place).
F. GUTTERS AND DOWNSPOUTS

1. Gutters can cause what seems to be a roof leak that shows up in the interior ceiling-wall edge intersection.
These leaks expose themselves by traveling down gutter fasteners, getting behind the fascia, and sliding down an overhang that is pitched toward the outside wall.
Leak Repair: Leveling the gutter fasteners so they slope away from the house can fix this leak. Spinning the gutter Ferrell’s seam under the gutter spike can also stop a leak.
If the seam is on top of the spike the water can run down the spike towards the fascia and enter the spike hole finding its way into the overhang.
2. Leaks that are caused by downspouts usually are formed from poor placement.
An example of this would be a downspout outlet placed just behind a wall corner.
Leak Repair: The fix for this is a downspout extension that goes at least six inches beyond the corner, or directly into the gutter.
3. Leaks that start behind the gutter are the product of a short aluminum fascia that does not extend under the gutter- drip edge.
In this case, the water runs behind the fascia and can show itself in the living area below the leak’s initial entry point.
G. SKYLIGHTS

1. Skylight leaks usually occur when nails are placed in the upper flashing too close to the skylight.
2. The other leak that occurs is in the light itself. This is usually the effect of glass seals going bad due to age( 20 to 30 years).
3. Bubble skylights on a shingle roof, that have no step flashing, base, or upper flashings.
Roof Leak Repair: The Skylights should be replaced if possible.
Wrapping Up
Getting your leaking roof repaired is essential as it can damage the interior of your home, cause the roof rafters to rot over time, and will also make the interior a lot colder. While hiring a professional is always your best bet, many of these roof leaks can be fixed by you after a trip to your local hardware store.
Make sure you let us know how you got on and if you were able to find roof leaks, as well as if it was helpful when trying to determine the source of your leaking roof. Just make sure you are careful if you decide to undertake the task of replacement shingles and take on some of the tougher work yourself – you might end up doing more harm than good.