Learn how to put RipCart to work for you. Learn how to open RipCart, close RipCart, install a circular saw, change the blade, and change the blade depth.

Note: Keep arms, fingers, and cords away from hinges.
How to open RipCart™
- Raise top handle – Simultaneously depress two buttons (at front of RipCart™) and raise the top handle.
- Release bottom handle lock – Squeeze the frame plate (thumb) and release button (index finger) together.
- Raise handle into position – Raise handle until both the top and bottom of the handle lock.
- Adjust handle angle – Release the bottom handle lock (similar to Step 2) and adjust the handle as needed.
How to close RipCart™
- Unplug extension cord.
- Close the power switch cover.
- Release top handle lock by pressing 2 buttons (middle of the handle) simultaneously and lower the top handle.
- Release bottom handle lock by squeezing frame plate (thumb) and release button (index finger) together.
- Lower the handle until the bottom locks into position.
- If necessary, move depth guide handle out of the way and lower top handle down until it locks into position.
How to attach circular saw to RipCart™
- Raise base plate to the highest level.
- Place saw into base plate.
- Slide saw lock tight against the saw table and tighten wing nuts.
- Tighten thumb screw to keep saw flush to base plate.
- Connect the ratchet strap and tighten.
- Wrap excess cord around the cord management system (at back of RipCart™) and plug saw cord into the RipCart™ switch plug.
- Wrap the velcro strap around the saw trigger.
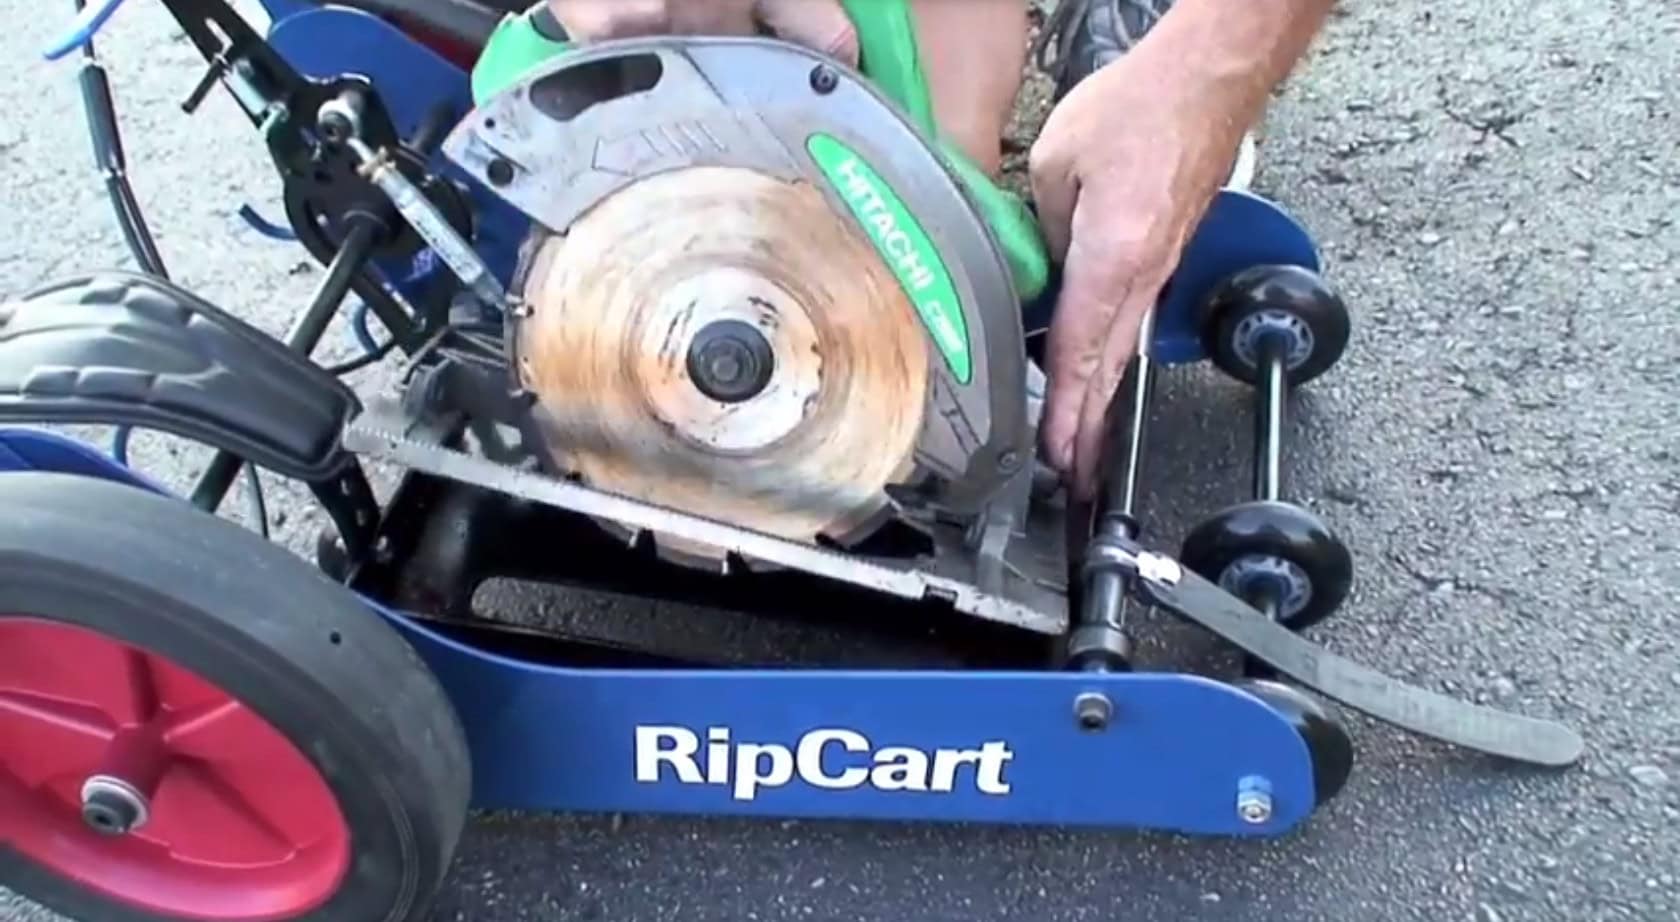
How to change saw blade on RipCart™
Warning: Be sure saw blade has cooled.
- Unplug extension cord from the RipCart™ plug.
- Raise base plate to the highest level.
- Place RipCart™ on side behind a fixed object.
- Replace saw blade.
How to change saw blade depth on RipCart™
RipCart™ controls the depth of the saw blade using 2 features.
Depth Guide (for large adjustments in depth)
- Release the depth guide lock by squeezing the depth guide handle.
- Move the handle forward (toward the front of the RipCart™) to lower the saw blade depth or backward (toward the back to raise) to raise the saw blade depth.
- When the saw blade is at the desired depth release the depth guide handle to lock it into position.
Fine adjustment (for minor adjustments in depth)
- Release the fine adjustment brass lock nut.
- Rotate the fine adjustment to the desired depth.
- Tighten the brass lock nut to lock the fine adjustment into place.
Learn more about RipCart™ Demolition Cutter.